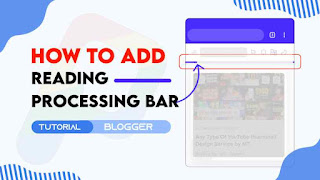
If you are looking for how to add a Reading Processing Bar to the Blogger website then this post is just for you. I am Monish. I have been involved with coding for a long time. I will give you proper advice from long experience so let's start. We only used then HTML ,CSS and JS. Are you upset about your website speed? do not worry it doesn't affect your website speed. Also do not worry about it this Accordion Section also has dark mode CSS that you just want to change the dark mode class that we gave with your theme dark mode class, you can fluently change it by following this tutorial precisely. Should you add a Reading progress bar? As I would see it, I will tell yes you need to add a perusing progress bar in your Blogger site on the grounds that your site guests will consider this like a difficult model: to peruse the article totally and the advancement bar will assist with perusing the article totally for guests and your site impressions increments. How progress ba...
A collection of SVG icons for you, so you can use them while making changes in your theme or you can use them in your Blog Posts. Where can I get HTML code for SVG icon? If you have a file with .svg extension, you can open it in any browser then press ctrl+U and copy all the HTML code that appears. You can also use Notepad to open SVG files. Some of the icon packs shared are licensed under Creative Commons (Attribution-ShareAlike 3.0 Unported) which means to appreciate the creator, add a credit link to the icon maker. License information last checked: January 13, 2022 Eon - Social Median and Contact Info Credit: iconfinder.com/bombasticon <svg xmlns='http://www.w3.org/2000/svg' viewBox='0 0 32 32'><g><path d='M16,3A13,13,0,0,0,4.53,22.13L3,27.74a1,1,0,0,0,.27,1A1,1,0,0,0,4,29a.84.84,0,0,0,.27,0l5.91-1.65a1,1,0,0,0-.53-1.93L5.42,26.56l1.15-4.3a1,1,0,0,0-.1-.76A11,11,0,1,1,16,27a11.23,11.23,0,0,1-1.84-.15,1,...
Hello friends, today in this blog, you’ll learn how to create a Custom Right Click Context Menu in HTML CSS & JavaScript. In the earlier blog, I have shared how to create a Custom Price Range Slider in JavaScript , and now it’s time to create a custom context menu. A context menu is a contextual, shortcut, or pop-up menu that appears on the mouse right button click. It contains a limited set of choices that are related to the selected object. In this project (Custom Context Menu), the context menu appears on the mouse right button click and disappears on the mouse left button click. On this menu, there is a sub-menus too. This sub-menu change its position from right to left if there isn’t enough space to show it to the right side. You can watch a demo or full video tutorial of it. Video Tutorial of Right Click Context Menu in JavaScript In the above video, you have seen the demo of this right-click context menu and how I created it ...
How to Make Download Box with Countdown Timer for Blogger Script Store 360
Hey dear blog reader, if you are using a download blogger site then you need
to use a countdown button to control your website bouns rate. In this article,
I will show you how can we put an awesome countdown download box in your
blogger post.
So, today we are able to make a download container with a countdown timer for
the blogger internet site. while customers will click on the download button,
a countdown will start before the download starts off evolved.
How to make a Countdown Download Box?
Creating a Countdown Download Box for your Blogger Website will not
require much knowledge about HTML, CSS, or JS because I have already designed
it for you. What you need to do is to implement the codes in the right place
in your Blogger Theme XML.
Important!
Before we start adding codes in XML, I will recommend you to take a Backup of
your current theme.
By chance if any problem occurs, you can restore it later.
Step 04: Click Edit HTML you will be redirected to editing page.
Step 05: Now search the code ]]></b:skin> and
paste the following CSS codes just above to it.
If your template has a dark mode feature, and if you want a different color
when in dark mode, you can customise the codes as per your need. Each template
can have a different dark mode class, so please adjust it, you can replace the
marked class with your template dark mode class.
আপনি আমাদের আলোচনায় জড়িত থাকতে পেরে আমরা আনন্দিত। প্রত্যেকের জন্য একটি সম্মানজনক এবং অন্তর্ভুক্তিমূলক পরিবেশ নিশ্চিত করার জন্য, আমরা নিম্নলিখিত নির্দেশিকাগুলির সাথে আপনার সহযোগিতার অনুরোধ করছিঃ
১. গোপনীয়তা রক্ষাঃ অনুগ্রহ করে আপনার মন্তব্যে সংবেদনশীল বা ব্যক্তিগত তথ্য শেয়ার করা থেকে বিরত থাকুন।
২. ইতিবাচকতা ছড়ানোঃ ঘৃণাত্মক বক্তৃতা বা আপত্তিজনক ভাষার প্রতি আমরা শূন্য-সহনশীলতার নীতি বজায় রাখি। আসুন আমাদের কথোপকথনকে সম্মানজনক এবং বন্ধুত্বপূর্ণ রাখি।
৩. পছন্দের ভাষাঃ ইংরেজি বা বাংলা’তে নির্দ্বিধায় নিজেকে প্রকাশ করুন। এই দুটি ভাষা আমাদের পরিষ্কার এবং সুসংগত আলোচনা বজায় রাখতে সাহায্য করবে।
৪. বৈচিত্র্যকে সম্মানঃ একটি অন্তর্ভুক্তিমূলক পরিবেশ গড়ে তোলার জন্য, আমরা দয়া করে অনুরোধ করছি যে আপনি আপনার মন্তব্যে ধর্মীয় বিষয় নিয়ে আলোচনা করা এড়িয়ে চলুন।
মনে রাখবেন, আপনার মতামতগুলি মূল্যবান, এবং আমরা আমাদের পাঠকদের সবার জন্য একটি স্বাগত জানানোর জায়গা করে তোলার জন্য আপনার প্রতিশ্রুতির প্রশংসা করি৷ আসুন গঠনমূলক এবং সম্মানজনক আলোচনার মাধ্যমে একসাথে শিখতে এবং বৃদ্ধি পেতে থাকি।
আমাদের ষ্ক্রিপ্ট ষ্টোর ৩৬০ ওয়েবসাইটে যুক্ত থাকার জন্য আপনাকে ধন্যবাদ! 🌟
কুকি সম্মতি
আমরা ট্রাফিক বিশ্লেষণ করতে, আপনার পছন্দগুলি মনে রাখতে এবং আপনার অভিজ্ঞতাকে অপ্টিমাইজ করতে এই সাইটে কুকিজ পরিবেশন করি৷
মনে হচ্ছে আপনার ইন্টারনেট সংযোগে কিছু সমস্যা আছে। অনুগ্রহ করে ইন্টারনেটের সাথে সংযোগ করুন এবং আবার ব্রাউজিং শুরু করুন৷
AdBlock Detected!
We have detected that you are using adblocking plugin in your browser. The revenue we earn by the advertisements is used to manage this website, we request you to whitelist our website in your adblocking plugin.
Site is Blocked
Sorry! This site is not available in your country.